


I recently had a thyroidectomy. Here’s what to expect.
If you know me in person or follow me on any of my social accounts, you may know I recently had a thyroidectomy. For me, the took out half of my thyroid. The right side to be specific.
Before my surgery I had spent some time looking around the internet to see if I could find some things on what to expect, what the scar would look like, how long I may be out and any other info that could help me plan for what was coming.
Sadly, I didn’t find much. So I want to share my own experiences with anyone who may be going into something like this themselves.
For me, I had a partial thyroidectomy. The right side had a 2 inch cyst growing on it for the past several years that was really starting to become a problem for me. It was making it harder to breath. Now that it’s out I see that it was also making it difficult to swallow, and it was also effecting how I would sit or lay on the couch. Any position where my chin was curled in, was super uncomfortable as it was pushing in towards it causing it to push into my throat.

The Surgery:
The day leading up to the surgery I was told not to eat or drink anything basically 8 hours or so before the surgery. They gave me some things I could eat like an apple at certain times prior but I learned that if your doctor is fast and efficient, your surgery can be moved up and if you ate an apple you have to wait. So maybe skip the apple haha.
The surgery itself was super fast and an outpatient surgery. I came in some time in the morning and left by 3. This was my first surgery so the whole experience was interesting for me. From being wheeled around the hospital in a bed to getting pushed out to the car in a wheel chair. Since this was my first surgery and I’d never been on any kind of Anesthesia, I wasn’t sure how I was going to act. I have seen all the videos of people waking up and saying funny things to people, that was not me. I could not stop crying. I felt so full of emotion that I was a crying disaster. It wasn’t like I was even trying to cry, it just kept coming out and I kept apologizing for crying to all the nurses.
I sat with an ice pack on my neck for a long time. Had something to drink and some crackers and when I felt like I was good to stand, put my clothes back on and was discharged.
After Surgery:
Before I left the hospital, I asked if there was any specific way I should be laying down, things I should be doing, not doing. They told me that I shouldn’t get my neck wet for 2 days and that I was not to lift anything over 5lbs for 2 weeks. When I got home to rest, it felt best to lay on the couch with the ice pack on my neck. My muscles and neck were starting to get sore and it was all a little painful-even while laying down. Most of the pain came while I was actually laying down, like the act of laying backwards. It helped to sit sideways and lay down, same with getting up. I didn’t realize the amount of muscles that go into your head hitting a pillow for the night. Turning over was also uncomfortable and difficult. After a day or so, laying down was much easier and I found good positions to sleep in.
I felt pretty ok. I was really tired though and felt like I could take a nap all day for the first couple of days. About day 3-4 I was up and walking around but still had an obvious lack of energy. By the end of the week I was basically back to normal but taking a good time to rest when needed.
Healing Progression
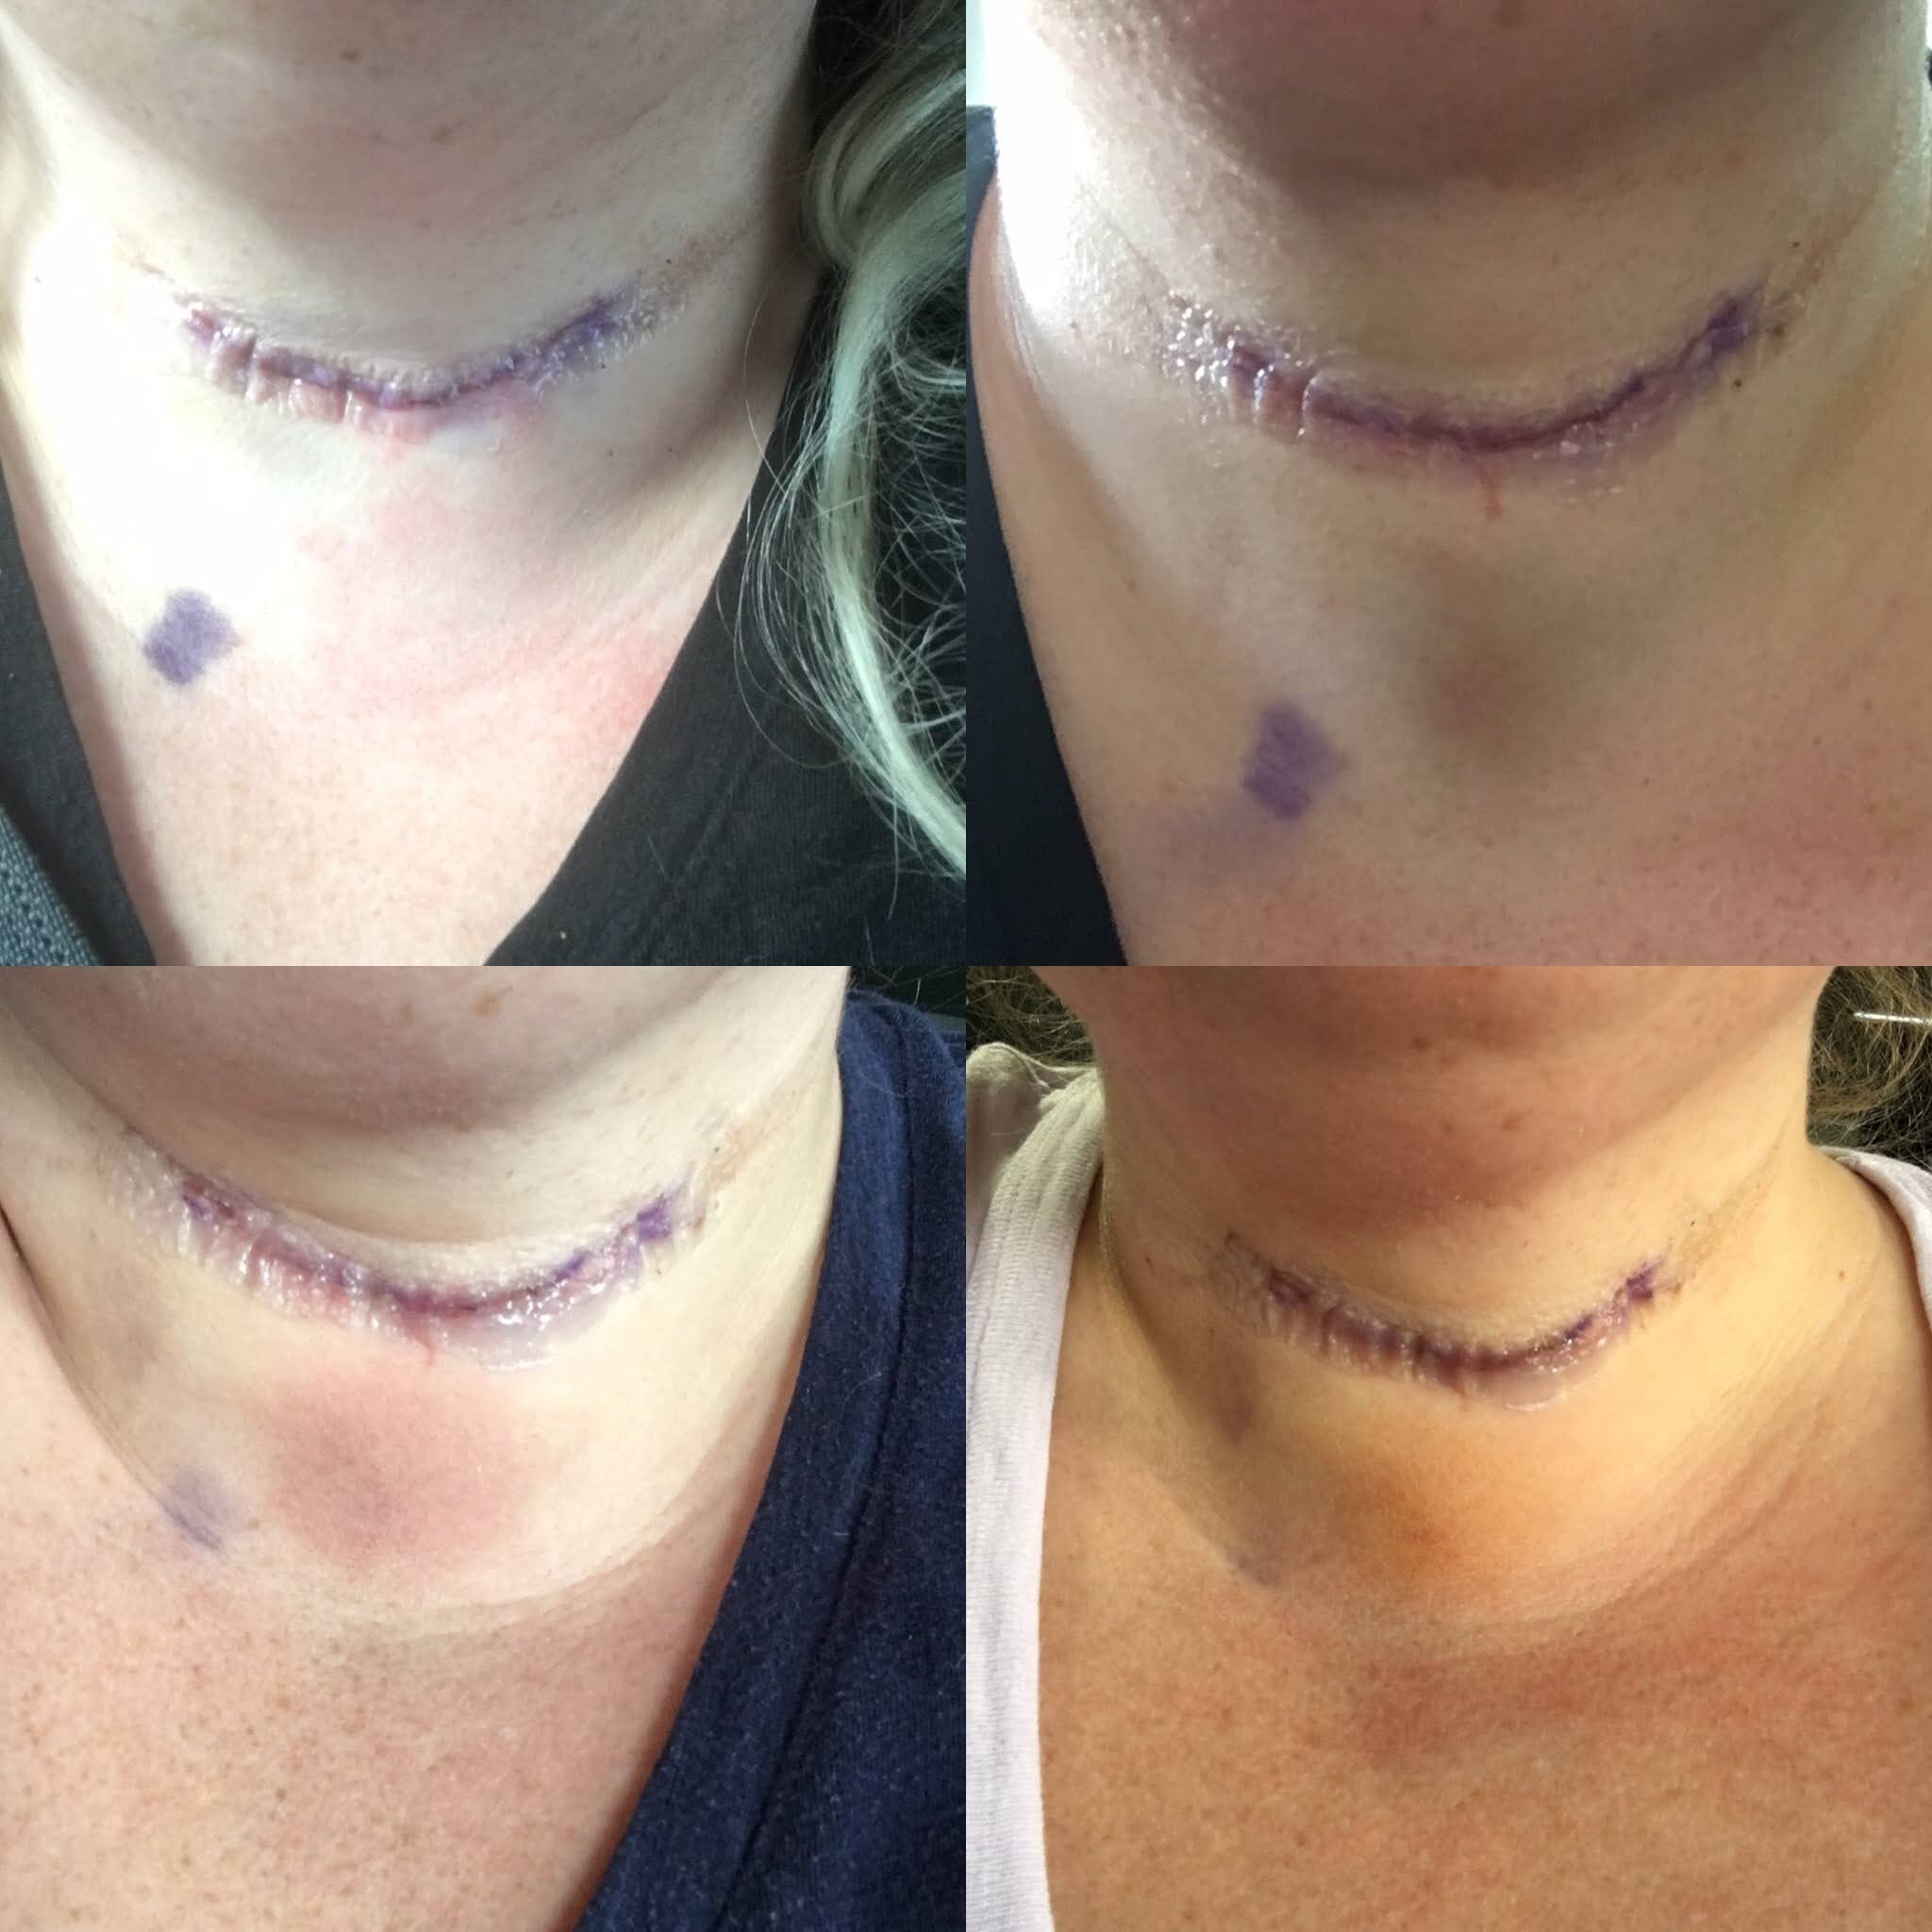
Since I’m a photographer and I like to document everything. I took some photos of my neck and the healing process. The first image a couple hours after surgery in the car on the way home. The next image is a progression of 4 days after surgery. The 3rd image is about a week out after my check up appointment when the glue had basically fallen off and you could actually see the full incision. The last image is what it looks like today. It hasn’t changed much really from this image. Still a little red line.


I did ask my surgeon to take a photo of my thyroid for me because I was so curious to see what it looked like. I had in my head what I though it would look like and what a cyst looked like but no idea of what it actually looked like. I felt funny asking that because I happened to ask as I was falling asleep pre surgery but, they did what I asked and took it for me. I didn’t get to see it though till my check up appointment. I’m going to post the image below but if you’re not into seeing medical things or are grossed out by this…. stop scrolling now… or scroll really fast. :)
STOP SCROLLING OR SCROLL FAST IF YOU DON’T LIKE MEDICAL IMAGES

The top of the thyroid and where my cyst was located is on the left. The thyroid is butterfly shaped, so this is just one half.
SAFE POINT :)
Mine came back noncancerous, thankfully, but it was still something that I’m glad I got taken out. I’m now currently working on getting my medication levels correct. I even got one of those little pill cases to keep by my bed to make sure I took the pills every day. Skipping them on accident makes me so tired for days to come.
If you are looking to have this done and have questions I may not have answered, feel free to leave a comment and I’m happy to share what my experiences were that I may have forgotten to add into this post. If you’re having this done, I’m sending you all the biggest healing vibes and good luck your way! <3

A Seriously Delicious Rice Krispie Recipe
I love a good rice Krispy treat. In fact it’s the treat I look for at coffee houses. It’s hands down what I’ll get if it’s an option.
No rice Krispy is a bad rice crispy but I have had my fair share of ones that didn’t quite nail it on flavor. Maybe I’m just a RK snob? Who knows.
This recipe though is super desirous and I use it every time I go to make them myself.

What you’ll need:
6 Tbsp. unsalted butter
1/2 cup sweetened condensed milk
1 tsp. vanilla extract
10 oz. big or mini marshmallows
6 cups rice krispy cereal
one big pan to put them in
Instructions:
In a large pot, melt butter until it starts to bubble.
Next, add in the condensed milk, and stir. When it starts to boil, let sit for about a minute.
Add in the vanilla as well as marshmallows. Stir till marshmallows are fully melted.
Remove from heat. Add in all of your rice krispy cereal. Stir together and make sure it is mixed together evenly.
Grab your pan, lightly spray/grease it and add in your Krispy mix. Use a spatula to move it into place.
Allow mixture to set. Usually takes 30 minutes or so then cut and serve!
Depending on the season, you could add in sprinkles or something fun and festive to your mix or to sprinkle on top. Maybe even cut some out with cookie cutters to create something even cooler!
If you make these, let me know! I’d love to know what you think. :0)

A weekend in Berea Kentucky
A couple weekends ago my boyfriend and I planned a trip to Williamsburg to see Cumberland falls and then to Berea to check out their art community.
We haven’t really had a vacation since many months pre covid so we really were ready to get out of our apartment and see some things (safely of course.)
Our first stop was Cumberland falls. If you haven’t been it’s a giant waterfall located near the Kentucky Tennessee border. It’s one of the only places you can see something called a Moonbow- where the moon creates a reflection that looks like a rainbow. It happens a couple times a month but we happened to be there a week prior. Whoops :).

There are a couple places for you to get a good look at the falls. So if one is too crowded, keep walking back. I chose not to bring a camera with me on this trip and I probably should have because the falls were lovely!
The next day we woke up early and headed to Berea! I was super excited about this one. I love seeing people make things and checking out a good tiny shop. We started out in a super cute little fabric shop where the lady there taught me a little bit about how quilts are finished. Then we headed around town to several other little shops where I picked up several cute little things for the apartment.
Brea is such a cute little place and has a super awesome college program there.

For lunch we stopped at Papaleno’s. If you know me well, you know I love a good pizza and I’m always on the hunt for a good slice. This places it totally worth stopping in and checking out.

If you’re looking for an easy weekend trip, this may be the perfect one for you! Personally I’d say you could skip the falls and just hang out in Berea the whole weekend. There is so many fun places to look around in.

A Fiesta Themed Birthday Party
A part of my job that I love doing is making sets and getting the opportunity to get crafty. People come to me with so many themes that I never really get bored of what I’m doing. Recently I had a family tell me they wanted to do a Fiesta themed birthday session. Something I had never done before.
I set off to Pinterest to gather a ton of ideas on the cake, cake topper, background and any other little bits and pieces I should add in.
My list included:
Fiesta colored balloons
A GIANT taco
A GIANT piñata
Streamers
1 “uno” cake topper with little tacos on it
Fiesta themed cake
Quite the list. Now I realize I could just go and buy a lot of this from Target but that is simply just not my style. I love a good craft project and always jump to making something before I buy it. I placed a huge order at Michaels for tissue paper, balloons, poster board and lots of extra hot glue. I already have a huge amount of scrap book paper… like an unhealthy amount so the cake banner was already taken care of.
I started with the piñata.
I laid out two pieces of white poster board and drew what I thought was a pretty good looking piñata shape and cut it out on both pieces. Then I measured out how thick the middle should be, I said 5 inches, and cut several strips of that. Once I had them ready to go, I took tape and tapped together all sides of the piñata to make a base that I could glue the tissue paper to.
When I started this project, I expected it to take a very small amount of time. Maybe an hour tops. Turns out it was more like 4-5. After cutting all the tissue paper into strips and adding fringe and then gluing it on, a ton of time passed. Luckily, I had a lot of movies to watch on Netflix while I got it all put together.

Next It was the giant tacos turn. A much easier project that took maybe 20 minutes.
I took brown poster board and cut it into a hard taco shell shape. Added a 5 inch middle section and tapped them all together. Then I took tissue paper in the colors of things that would be inside a taco and added it around the outsides. I could have spent more time on the taco and made it way cooler but I think the prior project took a lot of my energy away that day.

Next was the cake and cake banner. I used a vanilla cake with vanilla frosting colored with different fiesta colors. Unfortunately all I could find in my cake drawer were my neon colors but I think it worked pretty ok. For the banner, I popped it into my Cricut and cut out a simple flag with some letters. The taco pieces are cut by hand.


It was a full day of work but I think the final results were worth it! And I hear from the family that the cake was quite tasty too! Can’t wait to see what new projects will come my way soon!
